Par-baked pizza involves partially baking the crust to set its shape and texture, creating a crispy base for toppings. This method ensures the crust doesn’t become soggy, making it ideal for home cooks and restaurants. By pre-baking the dough, you achieve a firmer foundation that holds toppings perfectly. Par-baking is a time-saving technique that allows for customization and convenience, ensuring a delicious, professional-quality pizza every time. It’s perfect for those looking to simplify the pizza-making process while maintaining flavor and texture;
Overview of Par-Baked Pizza
Par-baked pizza refers to a partially baked crust that is cooked until set but not fully browned. This method allows the dough to retain its shape and texture, preventing sogginess when toppings are added later. Par-baked crusts are ideal for customization, as they can be topped and baked again to completion. They are commonly used in both home and professional settings, offering convenience and consistency. The process typically involves baking the dough at a high temperature for a short time, creating a crispy base that is ready for toppings. This technique ensures a perfectly cooked pizza with a balance of crunch and flavor.
Importance of Par-Baking in Pizza Preparation
Par-baking is a crucial step in pizza preparation as it ensures the crust sets properly, preventing sogginess and promoting crispiness. By partially cooking the dough, it gains structure, making it easier to top without losing shape. This method is especially beneficial for homemade pizzas, where controlling cooking times can be challenging. Par-baking also streamlines the cooking process, allowing for efficient preparation and consistent results. It’s a time-saving technique that enhances the overall quality of the pizza, ensuring a delicious and professional finish every time.
Benefits of Par-Baked Pizza Crust
A par-baked pizza crust offers numerous advantages, including a crispy texture and a firmer base that holds toppings securely. This method prevents the dough from becoming soggy, ensuring a delicious crunch in every bite. Par-baking also saves time, as it allows for quick final baking after adding toppings. Additionally, it provides flexibility, enabling customization with various toppings without compromising the crust’s integrity. The pre-cooked crust is ideal for busy home cooks and restaurants alike, delivering consistent results and enhancing the overall pizza experience with its golden, evenly cooked texture.
Preparation Steps for Par-Baked Pizza
Preheating the oven, preparing the dough, thawing frozen dough, rolling it out, and transferring it to a baking surface are essential steps for par-baked pizza success.
Preheating the Oven
Preheating the oven is a critical step in par-baked pizza preparation. Set the oven to 425°F to 500°F (220°C to 260°C), depending on your oven type. For a standard oven, preheat for 10-15 minutes to ensure even heat distribution. If using a pizza stone or steel, place it inside the oven during preheating to enhance crust crispiness. Convection ovens may require slightly lower temperatures to prevent overcooking. Proper preheating ensures the dough cooks evenly and quickly, setting the foundation for a perfectly par-baked crust. Always allow the oven to reach the desired temperature before placing the dough inside for optimal results.
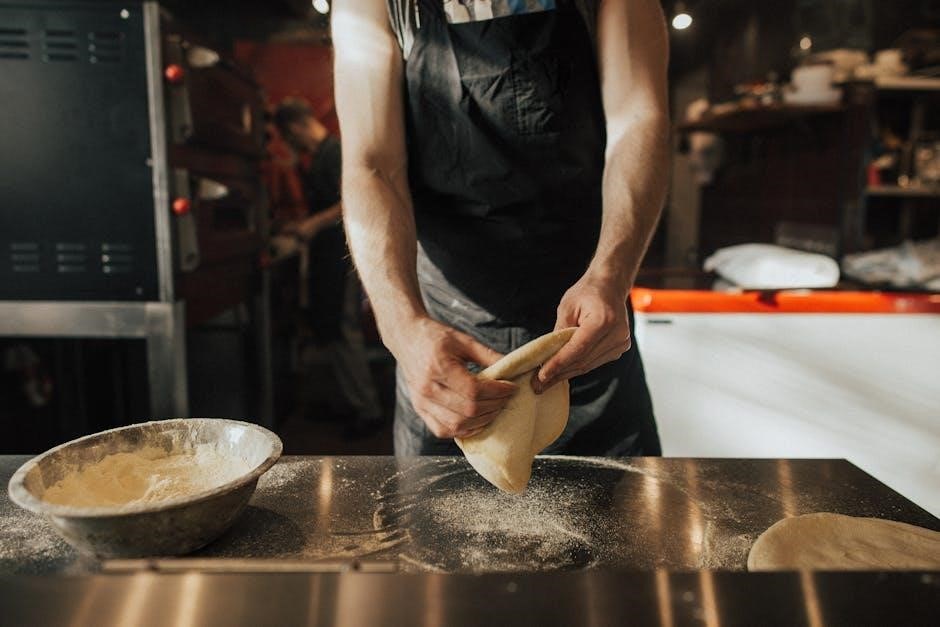
Preparing the Pizza Dough
Preparing the pizza dough involves allowing it to come to room temperature for easier handling. If using frozen dough, thaw it according to package instructions. Divide the dough into desired portions and let it rest for 10-15 minutes to relax the gluten. Lightly flour a clean surface and knead the dough gently to shape it into a ball or roll it out into a circle or rectangle. Use a rolling pin to achieve uniform thickness, ensuring even cooking. If time allows, let the shaped dough rest for another 5-10 minutes to prevent shrinkage during baking. This step ensures a smooth, pliable dough ready for par-baking.
Thawing Frozen Pizza Dough
Thawing frozen pizza dough requires careful handling to maintain its quality. Place the dough in the refrigerator overnight for a slow thaw, ensuring it remains fresh. For quicker thawing, leave it at room temperature, covered with plastic wrap or a damp cloth to prevent drying. Avoid microwave thawing, as it can unevenly cook the dough. Once thawed, let the dough rest for 10-15 minutes to relax the gluten, making it easier to shape. Proper thawing ensures the dough retains its elasticity and rises evenly during baking, crucial for achieving a light and crispy crust in par-baked pizzas.
Rolling Out the Pizza Dough
Rolling out pizza dough requires a gentle touch to maintain its elasticity and texture. Place the dough on a lightly floured surface or parchment paper to prevent sticking. Use a rolling pin to evenly stretch the dough into your desired shape, starting from the center and working outward. Apply light pressure to avoid tearing the dough. For a uniform thickness, roll the dough to about 1/4 inch thick, ensuring it retains its shape. If using a pizza peel, sprinkle it with cornmeal to aid in transferring the dough. Avoid overworking the dough, as it can lead to a dense crust. Once rolled, the dough is ready to be transferred to a baking surface for par-baking.
Transferring Dough to Baking Surface
Transferring pizza dough to the baking surface requires care to prevent stretching or tearing. Lightly flour a pizza peel or baking sheet to ensure the dough doesn’t stick. Gently slide the rolled-out dough onto the prepared surface, taking care not to stretch it further, as this can lead to uneven cooking. For a crispy crust, sprinkle a small amount of cornmeal on the peel or parchment paper before placing the dough. If using parchment, trim excess paper around the dough for a clean bake. Once transferred, the dough is ready for par-baking, ensuring a sturdy base for toppings.
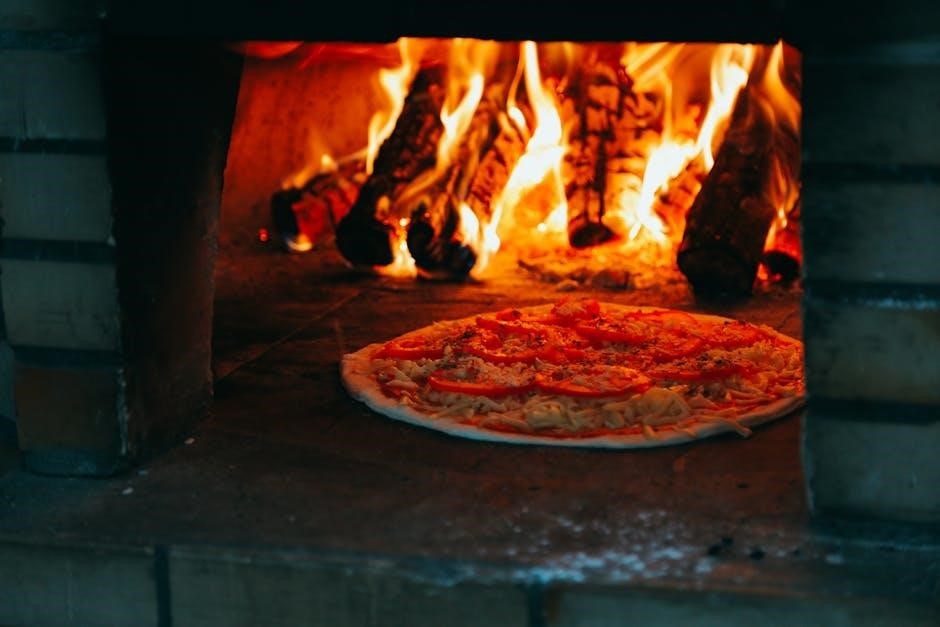
The Par-Baking Process
Par-baking involves partially baking the pizza dough in the oven at a high temperature, typically around 450°F, for 5-7 minutes. This step sets the crust’s shape and texture, ensuring it’s firm but not fully browned, creating a sturdy base for toppings. The dough will remain light in color but feel set when done, ready for adding your favorite ingredients before final baking.
Temperature and Time for Par-Baking
Preheat your oven to 450°F (230°C) for par-baking; Place the naked dough on a baking sheet or pizza stone and bake for 7 minutes. The crust will be set but not browned, ready for toppings. Adjust time based on crust thickness and oven type. Thinner crusts may need 5-6 minutes, while thicker ones require up to 10 minutes. Ensure the dough is lightly cooked but still pale. This step prevents sogginess and ensures a crispy base. Monitor closely to avoid overcooking, as ovens may vary. Proper par-baking is key for a perfect final bake.
Placing the Dough in the Oven
To place the dough in the oven, ensure the surface is lightly floured or dusted with cornmeal to prevent sticking. Gently slide the dough onto a preheated pizza stone or baking sheet lined with parchment paper. If using a pizza peel, sprinkle it with flour or cornmeal before transferring the dough. Position the dough evenly to ensure uniform cooking. Avoid stretching or pulling the dough once it’s on the baking surface. Close the oven door immediately to retain heat. Proper placement ensures the crust cooks evenly and prevents sagging or misshapen edges. This step is crucial for achieving a well-cooked par-baked crust.
Checking for Doneness After Par-Baking
After par-baking, check the crust for doneness by inspecting its color and texture. The crust should be light in color, not browned, but set and firm to the touch. The edges may lift slightly, and the surface should appear dry with no raw dough visible. Use a spatula to carefully lift the crust and ensure the bottom is lightly cooked but not golden. Avoid over-baking, as the crust will finish cooking when toppings are added. Proper doneness ensures the crust holds toppings without sagging while remaining crispy. This step is essential for achieving the perfect texture in the final baked pizza.
Removing the Par-Baked Crust from the Oven
Once par-baked, carefully remove the crust from the oven using oven mitts or a heat-resistant spatula to avoid burns. Gently slide the crust onto a wire rack or lightly floured surface to cool slightly; Ensure the crust retains its shape and doesn’t tear during removal. Allow it to cool for a few minutes before adding toppings, as this helps prevent sogginess. The crust should be firm but still pliable, ready for toppings. Proper handling ensures the crust remains intact and evenly cooked for the final baking step.
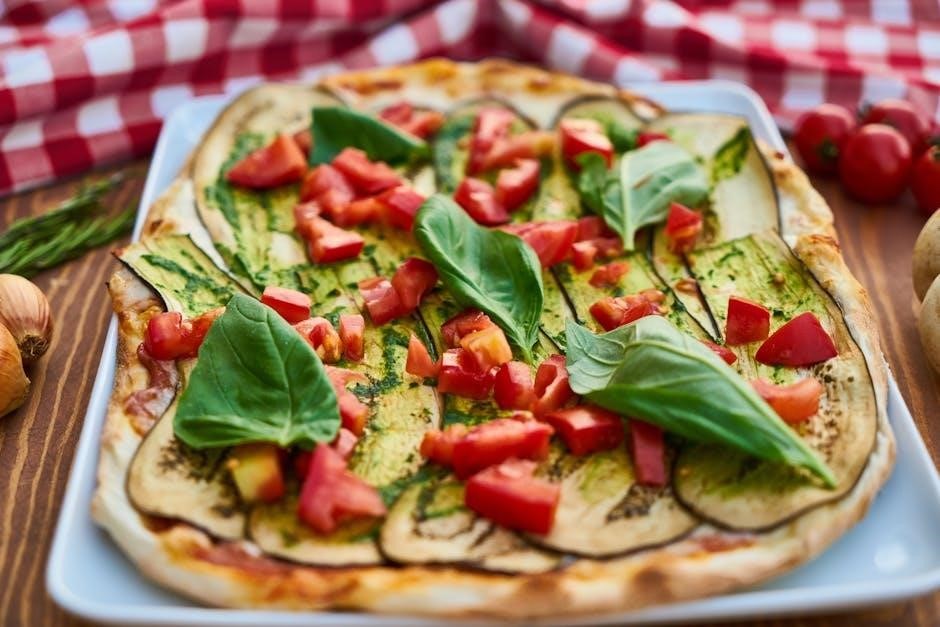
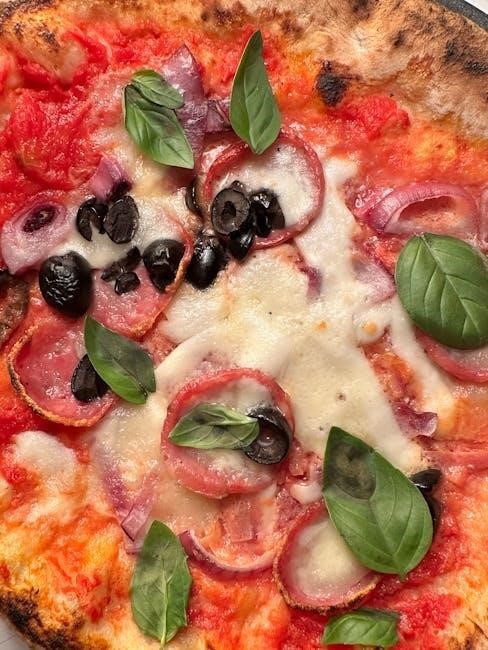
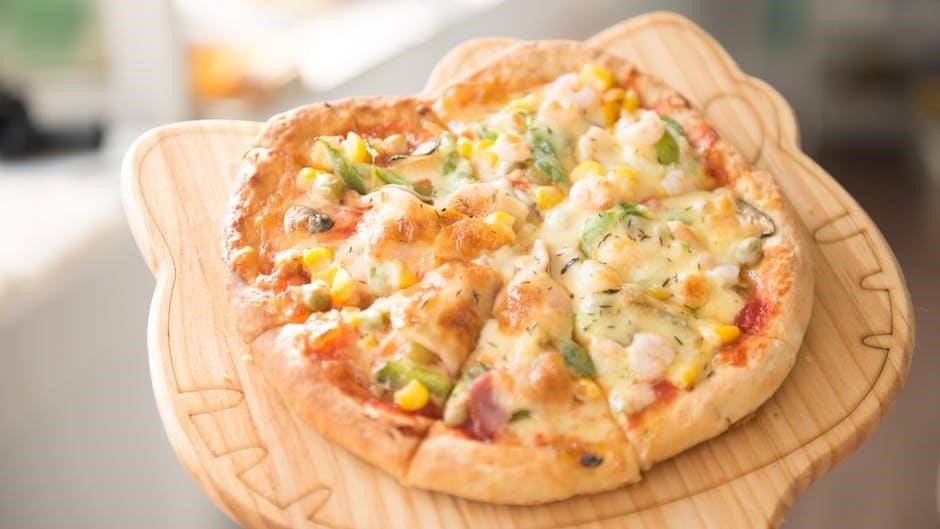
Adding Toppings to Par-Baked Pizza
After par-baking, add your desired toppings evenly, balancing flavors and textures. Avoid overload to prevent sogginess. Spread sauce thinly, layer cheese, and add toppings, ensuring proper distribution for even cooking.
Guidelines for Selecting Toppings
Selecting the right toppings is crucial for a delicious par-baked pizza. Balance flavors and textures by combining meats, vegetables, and cheeses. Avoid overloading, as excessive toppings can make the crust soggy. Opt for toppings with complementary moisture levels; high-moisture ingredients like tomatoes or mushrooms may require pre-cooking. Consider the cooking time—delicate toppings like fresh herbs should be added after baking. Ensure toppings are evenly distributed to allow proper melting and browning. For a crispy crust, avoid heavy sauces and excessive cheese. Experiment with seasonal ingredients or dietary preferences, such as vegan or gluten-free options, to customize your pizza.
Spreading Sauce Evenly
Spread sauce evenly over the par-baked crust, starting from the center and working outward. Use a spoon or ladle to apply the right amount—enough to flavor but not so much that it overwhelms the pizza. Avoid over-saucing, as this can make the crust soggy. Leave a small border around the edges for a crisper crust. Gently spread the sauce in smooth, even motions to ensure uniform coverage. For thicker sauces, a lighter layer is recommended to maintain crust crispiness. Preheating the sauce slightly can enhance flavor distribution. Optional: Mix herbs or spices into the sauce for extra flavor before spreading.
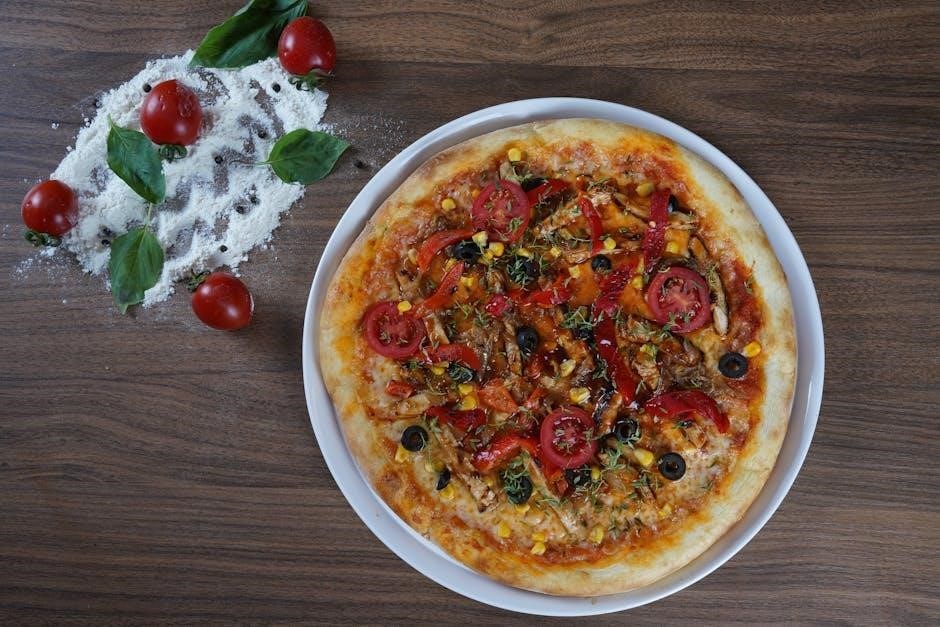
Adding Cheese and Toppings
After par-baking, spread cheese evenly over the crust, ensuring good coverage without overloading. Mozzarella is ideal for melting and flavor; Add toppings of choice, balancing flavors and textures. Avoid excessive toppings to prevent sogginess. Distribute toppings evenly for consistent cooking. Pre-cook meats and vegetables if necessary to avoid raw flavors. Sprinkle cheese on top for a golden, bubbly finish. Season lightly with herbs or spices for extra flavor. Keep toppings balanced to maintain crispiness and texture. Avoid overlapping toppings to ensure even melting and browning. This step is crucial for achieving a perfectly cooked, flavorful pizza.
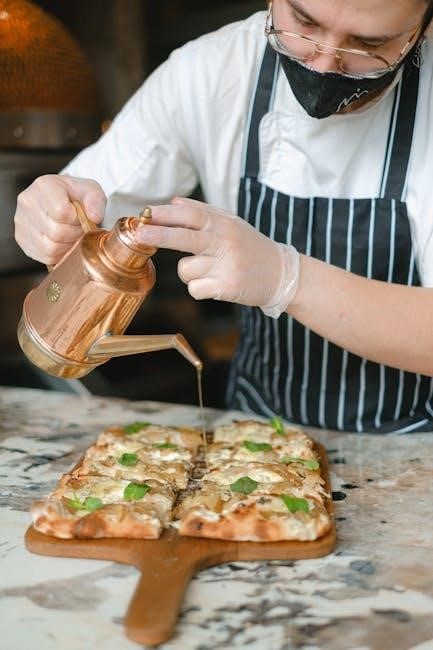
Seasoning the Pizza
Seasoning enhances the flavor of your par-baked pizza. Sprinkle herbs like oregano, basil, or garlic powder evenly over the crust before adding toppings for a savory base. A light drizzle of olive oil can deepen flavors. For a spicy kick, add red pepper flakes. Seasonings can also be added after baking for freshness. Experiment with combinations to find your perfect taste. Avoid over-seasoning to prevent overpowering other flavors. Keep it balanced to enjoy a delicious, aromatic pizza tailored to your preferences. Seasoning is the final touch that brings all the flavors together, making your pizza truly exceptional.

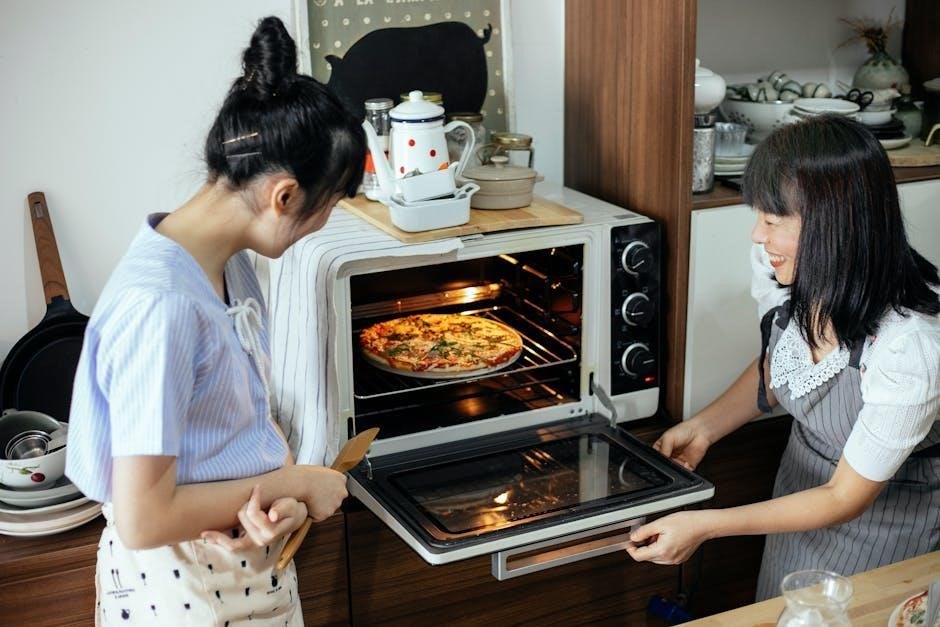
Baking the Topped Pizza
Preheat the oven to 450F, place the topped pizza inside, and bake for 7-10 minutes until the cheese bubbles and the crust is golden brown. Remove carefully.
Temperature and Time for Baking
The ideal temperature for baking a topped par-baked pizza is between 425°F and 450°F (220°C to 230°C). The baking time typically ranges from 10 to 15 minutes, depending on the oven type and topping quantity. A conventional oven usually takes 12-14 minutes, while a convection oven may require 8-10 minutes. The pizza is done when the cheese is bubbly, and the crust is golden brown. To ensure even cooking, rotate the pizza halfway through the baking time. Keep an eye on the pizza during the last few minutes to prevent overcooking. Proper temperature and timing are crucial for a perfectly baked pizza.
Placing the Pizza in the Oven
To place the pizza in the oven, ensure the oven is preheated to the desired temperature. Use a pizza peel or a lightly floured baking sheet to transfer the pizza to the oven rack. For a crispy crust, place the pizza directly on a preheated pizza stone or baking steel. If using a baking sheet, position it in the center of the oven. Gently slide the pizza onto the rack or stone, ensuring it’s centered for even cooking. Avoid jerking or moving the pizza once placed, as this can distort the shape. Close the oven door gently to maintain heat and promote even baking.
Ensuring Even Cooking
For even cooking, rotate the pizza halfway through the baking time to prevent hot spots from causing uneven browning. Use a spatula to carefully lift and rotate the pizza without damaging the crust. Preheating the oven and pizza stone ensures consistent heat distribution. Place the pizza in the center of the oven rack to avoid uneven cooking. Monitor the pizza through the oven window to check progress without opening the door excessively. For large pizzas, adjust the rack position to ensure all areas are exposed to equal heat. Avoid overcrowding the oven, as this can hinder air circulation and lead to uneven results.
Checking for Doneness
To check if your par-baked pizza is ready, look for a golden-brown crust with a firm texture. The cheese should be melted and bubbly, and the toppings should be cooked through. Avoid overcooking, as the crust can become too dark. Use a spatula to gently lift the pizza and inspect the bottom for even browning. If using a pizza stone, the crust should have a crispy edge. The aroma of cooked dough and melted cheese is also a good indicator. For most ovens, this process takes 7-10 minutes, but timing may vary depending on oven temperature and pizza size.
Cooling and Serving
Cool the pizza on a wire rack to maintain crispiness. Allow it to set for 2-3 minutes before slicing. Serve with your favorite garnishes or sides;
Cooling the Pizza Before Serving
Cooling the pizza before serving is crucial to ensure the crust remains crispy and toppings stay in place. After baking, remove the pizza from the oven and let it rest on a wire rack for 2-3 minutes. This allows the cheese to set and prevents toppings from sliding off. Cooling also helps the flavors meld together, enhancing the overall taste. Avoid placing the pizza on a flat surface, as it can trap steam and make the crust soggy. Once cooled slightly, slice and serve immediately for the best experience. Proper cooling ensures a perfectly textured, delicious par-baked pizza.
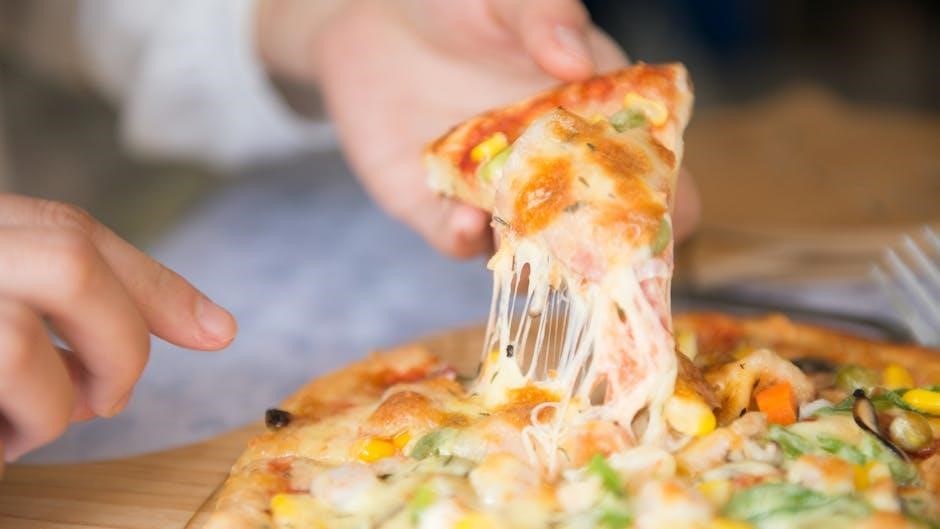
Slicing the Pizza
Once the pizza has cooled slightly, use a sharp pizza cutter or knife to slice it evenly. For clean cuts, ensure the pizza is on a stable surface, such as a cutting board or pizza peel.
Start from the center and make smooth, consistent strokes outward. This ensures uniform slices and prevents the crust from tearing. For a classic look, cut the pizza into 8 equal wedges. Letting the pizza cool for a few minutes before slicing helps the cheese set, making the process easier and neater. Proper slicing ensures everyone enjoys a perfect, evenly portioned piece of par-baked pizza.
Serving Suggestions
Par-baked pizza is best served hot, straight from the oven, to enjoy its crispy crust and melted toppings; For a complete meal, pair it with a side salad, garlic knots, or breadsticks.
Consider offering a variety of dips, such as marinara or ranch, for added flavor. To enhance presentation, sprinkle fresh herbs like basil or oregano over the pizza before serving. For a casual gathering, let everyone customize their slices with extra toppings or sauces. Pairing the pizza with a refreshing drink, like iced tea or soda, creates a satisfying and enjoyable dining experience for all.
Storage and Reheating
Store par-baked pizza crusts in airtight containers or plastic wrap at room temperature or freeze for later use. Reheat in a preheated oven at 400°F for 3-5 minutes.
Storing Par-Baked Pizza Crust
Once par-baked, allow the crust to cool completely on a wire rack to prevent moisture buildup. Store cooled crusts in an airtight container or plastic wrap at room temperature for up to 2 days. For longer storage, place in a freezer-safe bag and freeze for up to 3 months. Frozen crusts can be reheated directly in the oven without thawing. Proper storage maintains crispiness and prevents sogginess, ensuring the crust stays fresh for future use.
Reheating Par-Baked Pizza
Preheat your oven to 400°F (200°C) for even reheating. Place the par-baked crust on a baking sheet or pizza stone. Reheat for 5-7 minutes, or until the crust is warm and slightly crisped. For a crisper texture, increase the temperature to 425°F (220°C) and bake for 3-5 minutes. To enhance crispiness, brush the crust with olive oil before reheating. Avoid overheating, as it can make the crust too hard. Once reheated, remove from the oven and let it cool slightly before adding toppings. Proper reheating ensures the crust retains its texture and flavor for the best pizza experience.
Freezing Par-Baked Pizza
After par-baking, allow the crust to cool completely to prevent moisture buildup. Place the cooled crust on a baking sheet lined with parchment paper, ensuring it doesn’t touch other crusts to avoid sticking. Transfer the sheet to the freezer until the crusts are frozen solid, usually about 30 minutes. Store them in an airtight container or freezer-safe bag for up to 3 months. When ready to use, bake directly from the freezer at 425°F (220°C) for 10-15 minutes, adding toppings if desired. Freezing preserves the crust’s texture and ensures convenience for future meals.
Cooking Tips and Variations
Preheat your oven to 500°F for crispy crusts. Use a pizza stone for even cooking and rotate halfway through baking for uniform results. Experiment with toppings and seasonings to create unique flavor combinations, ensuring a delicious, customized par-baked pizza every time. Always monitor bake times to achieve the perfect texture and browning. These tips enhance the overall quality and taste of your par-baked creations. Try different cheeses, herbs, and sauces to elevate your pizza game. For a crispy crust, bake for an additional 2-3 minutes. Keep experimenting to find your perfect combination. Enjoy the versatility of par-baked pizza! Make it a fun, creative process for everyone. Savor the flavors and textures you craft. Happy baking!
Using Different Oven Types
Various oven types can be used for par-baked pizza, each offering unique benefits. Conventional ovens are ideal for home cooks, requiring preheating to 450°F–500°F for 7–10 minutes. Convection ovens enhance crispiness due to air circulation, reducing bake times by 1–2 minutes. Outdoor pizza ovens achieve high temperatures, par-baking crusts in 3–5 minutes for a smoky flavor. Preheating is essential for all types, ensuring even cooking. Use a pizza stone in conventional or convection ovens for better heat distribution. Always rotate the pizza halfway through baking for uniform results. Adjust temperatures and times based on oven type to avoid overcooking. Experiment with different ovens to find your preferred crust texture and flavor.
Enhancing Crust Crispiness
To achieve a crispy crust, preheat your oven to its highest temperature and use a pizza stone or baking steel. Preheating the stone for 30 minutes ensures even heat distribution. Bake the par-baked crust for 2-3 minutes before adding toppings. For extra crispiness, brush the crust with olive oil or cooking spray. Using a convection oven setting can enhance crispiness by circulating hot air. After toppings are added, broil for the last 20-30 seconds to crisp the crust further. A well-preheated stone and high temperature are key to a perfectly crispy base.
Customizing Toppings
Par-baked pizza allows for endless customization, enabling you to tailor toppings to your taste. Start with a base of tomato sauce, pesto, or olive oil for moisture. Add shredded mozzarella for creaminess, then layer meats like pepperoni, sausage, or ham. Vegetarian options include mushrooms, onions, bell peppers, and olives. Fresh herbs like basil or oregano enhance flavor. Balance toppings to avoid overwhelming the crust; For a gourmet touch, try unique combinations like prosciutto and arugula or artichokes and sun-dried tomatoes. Keep toppings evenly distributed to ensure proper cooking and crispiness of the crust.
Time-Saving Tips
Preheating your oven while preparing toppings saves valuable time. Use a pizza stone to accelerate cooking and enhance crust crispiness. Thaw frozen dough quickly by leaving it at room temperature or using a warm water bath. Partially bake the crust before adding toppings to streamline the process. Keep pre-measured toppings ready to avoid delays. For convenience, pre-bake multiple crusts at once and store them for later use. These tips ensure a quick and efficient par-baked pizza experience, perfect for busy schedules or large gatherings.
Safety and Troubleshooting
Always use oven mitts when handling hot pizza crusts. Ensure the oven is preheated correctly to avoid undercooked dough. If the crust browns too quickly, reduce the temperature slightly. Keep a fire extinguisher nearby for emergencies. Proper ventilation is essential to prevent smoke buildup. For troubleshooting, check oven temperature accuracy and dough thickness for even cooking. Never leave the oven unattended while par-baking. These precautions and solutions ensure a safe and successful par-baked pizza experience.
Oven Safety Precautions
When par-baking pizza, always use oven mitts or tongs to handle hot crusts to avoid burns. Ensure the oven is preheated correctly to prevent undercooked dough. Never open the oven door abruptly, as hot air can cause burns. Keep a fire extinguisher nearby and maintain proper ventilation to avoid smoke buildup. Avoid overcrowding the oven, as this can lead to uneven cooking and potential hazards. Always supervise children while the oven is in use. Let utensils and baking surfaces cool before handling. Adhere to these guidelines to ensure a safe and successful par-baking experience.
Troubleshooting Common Issues
Common issues when par-baking pizza crusts include uneven cooking, over-browning, or undercooked centers. To address these, ensure the oven is preheated correctly and use a pizza stone for even heat distribution. If the crust becomes too crispy, reduce the temperature by 25°F. For a soggy crust, bake longer or broil briefly. Avoid overloading with toppings, as this can prevent proper cooking. Always prick air bubbles with a fork during par-baking to ensure an even surface. If the crust tears, allow it to cool slightly before handling. Adjust baking time as needed based on your oven’s performance for optimal results.
Handling Hot Pizza Safely
When removing the par-baked pizza from the oven, always use oven mitts or tongs to prevent burns. Place the pizza on a heat-resistant surface, such as a cutting board or pizza peel, to avoid damaging countertops. Allow the pizza to cool slightly before adding toppings to prevent cheese from melting excessively. Never touch the hot crust or sauce with bare hands. Use a spatula or pizza cutter to portion the pizza safely. Keep the pizza away from children and pets until it has cooled enough to handle. Always prioritize caution when handling hot baked goods to avoid accidents.
Par-baked pizza cooking offers a convenient and delicious way to create custom pizzas at home. With proper techniques, you can achieve a crispy crust and perfectly cooked toppings, ensuring a satisfying meal every time. This method is ideal for both beginners and experienced cooks, providing flexibility and great results. By following these steps, you’ll master the art of par-baked pizza and enjoy homemade pies with ease. Happy cooking!
Par-baked pizza cooking involves partially baking the crust to set its shape and texture, ensuring a crispy base for toppings. This method prevents sogginess and allows for customization. Preheat the oven, bake the dough briefly, add toppings, and finish baking for a perfectly cooked pizza. It’s ideal for home cooks and restaurants, offering flexibility and consistency. Par-baked crusts can be stored or reheated, making meal prep easier. With proper techniques, you can achieve a professional-quality pizza with minimal effort. This approach simplifies pizza making while maintaining flavor and texture, ensuring a delicious result every time.
Final Tips for Perfect Par-Baked Pizza
For a perfect par-baked pizza, preheat your oven thoroughly and ensure the crust is lightly oiled to enhance crispiness. Avoid overloading with toppings, as this can make the crust soggy. Bake the crust until it’s set but not browned, then add toppings and finish baking until golden. Use parchment paper to prevent sticking and promote even cooking. Allow the pizza to cool slightly before slicing to retain toppings. Experiment with different oven types, like convection, for faster results. Store par-baked crusts properly for future meals, and reheat them gently to maintain texture. These tips ensure a delicious, professional-quality pizza every time.